


Base class: Plugin
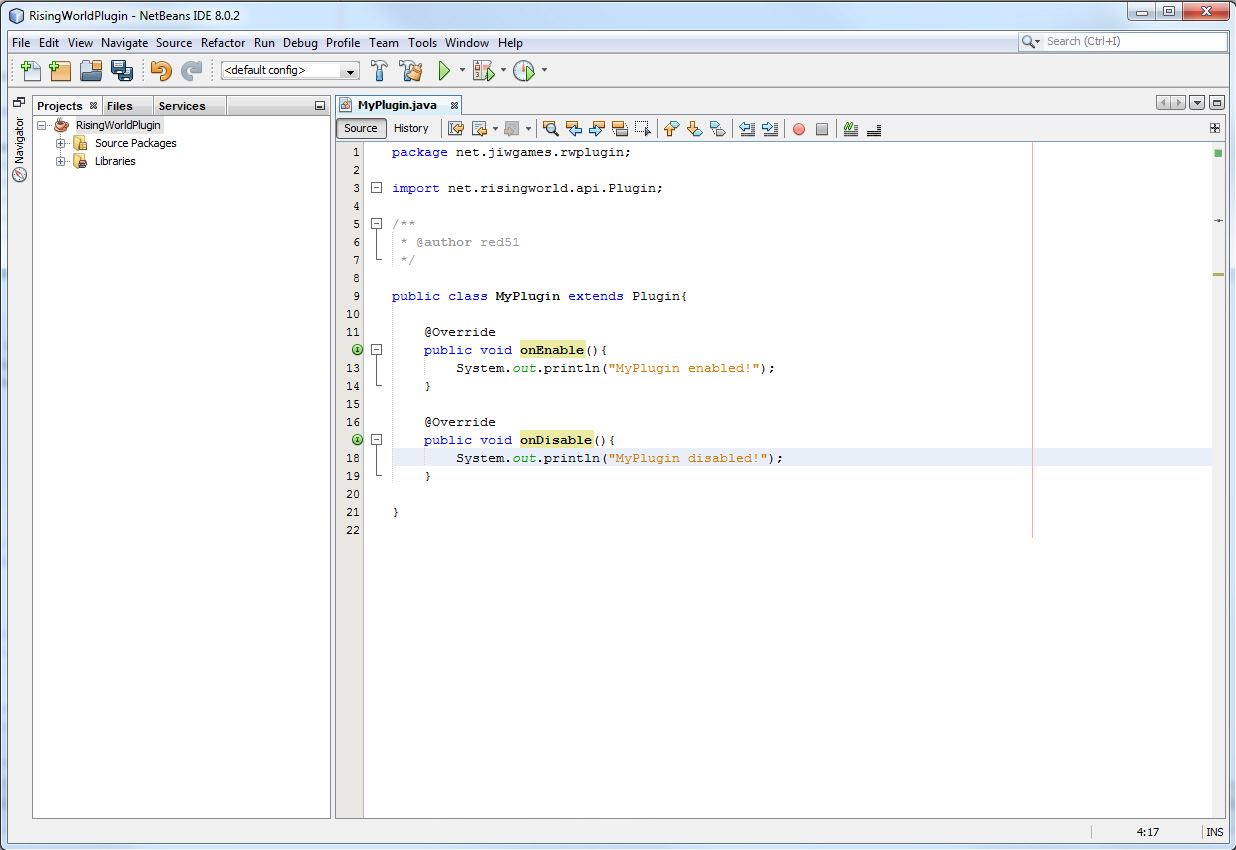
All plugins you are going to create for Rising World have one thing in common: They contain a class which extends the base Plugin class. Usually this is the first step in order to create a plugin.
When extending the Plugin class, you have to override the onEnable() and onDisable() methods. These methods will be called once the plugin has been enabled or disabled. It doesn't matter what code you put into these methods, depending on the structure of your plugin, you can initialize some variables there. It also makes sense to register all events in the onEnable() method (note: it is not necessary to unregister any events in the onDisable(), in general you don't have to care about any kind of "clean up").
Register events
If you want to listen to an event, you have to register it. It's recommendable to register all events you are going to need in the onEnable() method. The Plugin class has a registerEventListener(Listener) method, which expects a Listener. Every event listener has to implement this interface. It is up to you if you want to create separate event listener classes, or simply implement the Listener interface in your main plugin class.
The particular event methods in your listener are determined by its parameter. It is important that your event methods only have a single parameter, and this parameter must be any event object. The name of your method does not matter. Your event methods also need an "@EventMethod" annotation. Like any other annotations you have to put it above your method.
Example:
The "@EventMethod" annotation can take a threading parameter, which determines how the event method will be called:
| Threading.Async | Event methods will be called "directly", i.e. a server thread simply calls the event method without doing any synchronization. This is the fastest way to trigger events, but it is not thread-safe. This is the default mode. |
| Threading.Sync | Event methods will be called from the same server thread, but they will be synchronized. This way you can access shared variables from different events (all these events have to use the Sync threading model). |
Let the party begin
You are able to listen for events now, but the real action takes place when accessing the various server, world or player functions. Both Server and World are static class, providing various static methods.
Here is an simple example which outputs the server name, seed and world name once the server is started:
Here is a more complex Plugin-class which listens for the PlayerCommandEvent (when a player enters a command) as well as the PlayerChatEvent (when a player writes a chat message):
Final steps
Every plugin needs a definition file. It has to be called "plugin.yml" and belongs into a "resources" folder in your source directory (once you build your plugin, the resource folder will be added to the resulting jar automatically.
Here is an example "plugin.yml" definitions file:
The most important values are basically the name (the name of your plugin), the main (the path to your main class, including the full package name), the version (it's up to you to choose a version number) and the author (your name or your nickname).
One special setting is the loadorder: It can be used to determine the load order for your plugin. By default, the load order is 0. If all plugins have a load order of 0, they will be loaded alphabetically (so a plugin called "Library" will be loaded before a plugin called "Worldplugin"). If a plugin has a negative load order, it will be loaded earlier (so if "Worldplugin" has a load order of -100, and "Library" has a load order of 0, the game will first load the "Worldplugin"). If a plugin has a positive load order, it will be loaded later. This can be useful if your plugin depends on other plugins and you want to make sure the other plugin is loaded first before. If your plugin acts as a library or framework, it's usually recommendable to set a very low negative load order.
All other values are optional.
To release your plugin, you have to compile it (in Netbeans, for example, you can rightclick on your project and select "Clean and Build" to compile your plugin). The resulting jar file is basically your plugin (you can rename it if you want). Just put the jar file into a separate folder (e.g. you can call your jar file "MyPlugin.jar", and the folder "MyPlugin" accordingly), and move this folder into the "plugins" subfolder in your game or server directory (if there is no such folder yet, just create it). Now start your server or the game, and your plugin should be loaded.